12.20.2010
Tart-Pie Dough Made Easy & A How-To Video
For some reason, when I was first teaching myself how to bake, I set my sights on making all kinds of fresh tarts. I had my heart set on it-set on mastering my own, made from scratch, tart dough (or pate brissee.) And, it took a long time for me to master it. I am not sure that I have even mastered it as of yet, but at least I no longer mutter curses while I am making it. And I no longer have to throw the whole batch in the trash because I have tried to roll it so much, that it has become a gooey mess. Nor do I have to make all my tarts with the push in method because rolling it is too tricky. And at this point, that is mastery enough for me.
One of my biggest problems when learning to make my own dough was that I read over and over not to use too much flour when rolling my dough.
I was warned that it would ruin the dough and make it tough and tasteless. So I would use almost no flour, and every time my dough would stick. And then it would tear, and it was very, very ugly. After many ruined tart doughs I have learned that you don't have to take this warning too seriously. I mean, certainly do not lay your dough on a pile of flour, but a nice even layer of flour on top and on bottom will make your tart dough experience much easier. Even effortless.
.....................................................................................................
Tart-Pie Dough (Pate Brissee)
150 gr flour (1-3/4 cups)
pinch of salt
1 Tbs sugar (optional-if making a savory tart omit)
1 stick cold butter, cubed
2-3 Tbs water (or heavy whipping cream for a richer dough)
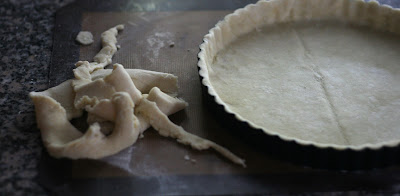
In the bowl of a food processor, add the flour, salt and sugar, if using. Pulse once to homogenize the ingredients. Add the butter, and pulse until the consistency has reached that of coarse bread crumbs. You can actually hear it once it has reached that consistency, the sound from the food processor is smoother. Take care not to process too long, you do not want to cut the butter too much, and you certainly do not want to heat the butter during this process, as the delicious part of the dough is the little bits of butter that melt and form a flaky crust. With the food processor running, add 2-3 Tbs of water. You want the dough to just start to come together. If you add too much water, the consistency of the dough will be gooey and the resulting crust hard. On a prepared surface, empty the contents of the food processor and work the dough with your hands, to form a flat disk. Wrap in plastic wrap and refrigerate for an hour. This will make the dough much easier to roll. Prepare a surface with a healthy amount of flour, remove the dough from the fridge, and allow to warm up for a couple of minutes. You don't want the dough to be too cold when you roll it because for one it is very hard to physically roll, and two, the dough will crack and become very hard to work with. It is ready to roll when you can just make a thumb print in it. Add flour to the top of the dough, and gently rub it in. This is so that the dough will not stick to your rolling pin, and break on you. With your rolling pin, roll evenly forwards and backwards. And with each couple of rolls, turn the dough 90 degrees. If you feel it is starting to stick on the bottom or top, add more flour. Don't be shy. Continue in this manner until your dough has reached the desired size. You can measure by laying the tart pie or pie plate on top and making sure it will fit. Once you have the size, gently fold the dough in half, then in half again. This just makes it easy to transport the dough from your rolling surface to the tart-pie pan. Carefully unfold the dough in the tart pan, making sure it is centered. Push down the tart into the edges and sides to make sure it is nice and snug against the pan. Lay the extra edges over the sides of the pan, and use your rolling pin to cut the edges off by running it along the sides of the pan. At this point you can fill this beautiful tart-pie shell with whatever your hearts desires, or wrap it and place in the fridge or freezer for future use.


